

It’s hard to see, but I’ve circled my Nikon 1 V2 camera that was attached to my CamelBak strap while I hiked the Grand Canyon.
When I started my research for my South to North Rim crossing of the Grand Canyon, naturally I was as concerned about the photographic end of it as I was the hike. I wanted to snap those iconic pics of the Big Ditch as much as I wanted to successfully trek across it.
The first question, of course, was which camera to use besides my trusty iPhone 7 Plus. I didn’t think the iPhone would have the image quality I needed to do a great job capturing the beauty of the Grand Canyon. But I wasn’t about to carry the camera that does have great IQ, my beloved Nikon D610, which is way too heavy and too valuable to risk dropping it to its possible death.

The Nikon 1 V2 is hanging from its Peak Design Cuff tether. Arrowed is the Peak Design Capture, which held the V2 when not in use.
So I decided to buy a used Nikon 1 V2 mirrorless camera . . . even though I have an even-older Nikon 1 V1. I liked that the V2 has a built-in flash, better image quality, and better build. And it’s a great size for hiking. I added a Nikon 1 6.7-13mm wide-angle lens and was hopeful I’d be getting amazing shots. By the way, Sony seems to be producing the best mirrorless cameras these days. Hikers really like them.
The next question was how to best tote the V2 and keep it out of the way when I was hiking with my trekking poles. I experimented with a small camera bag, but it was too awkward on my CamelBak Sundowner 22. Fortunately, I already owned the answer: The Peak Design Capture. This handy device allows you to securely clip a camera (using an included quick-release plate) to straps and belts. One push of a button frees the camera for easy use. I practiced with it before the crossing and felt it would do the trick.
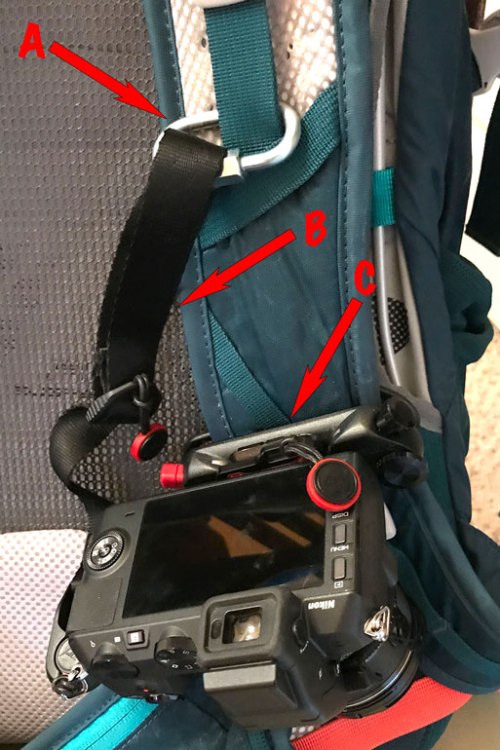
A close-up of my CamelBak’s tethering system: “A” points to the oval link attached to the strap and the Cuff (“B”). “C” is the V2 on the Capture.
Of course, being a mom with a mantra of “better to have it and not need it than need it and not have it” (as my sons well know!), I wanted to tether the camera to the CamelBak strap just in case it slipped out of my hands. I didn’t want the V2 to tumble down into an abyss, never to be seen again.
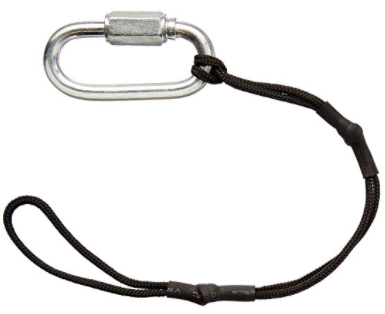
An Indigo Marble camera strap tether
My first step was to see what Amazon had to offer. The Indigo Marble camera strap tether looked interesting, so I ordered it. Unfortunately, the rope on the one I received was defective, so I sent it back. But seeing what the metal carabiner was like made me realize that I could come up with my own tether setup that would be sturdier. A mere buck or so bought me a 3/16-inch quick link (it twists open and closed) at Home Depot. I added a Peak Design Cuff wrist strap and voila! My homemade tethering system was born. And it worked great! The V2 was secure both on and off the clip.
Looking at my hundreds of photos, I was pleased with the performance of both the V2 and the iPhone 7 Plus. Both helped me capture and remember an epic experience. With a bigger sensor, the V2’s photos are more detailed and will look better in larger sizes. But the iPhone definitely has a terrific camera that’s always handy.
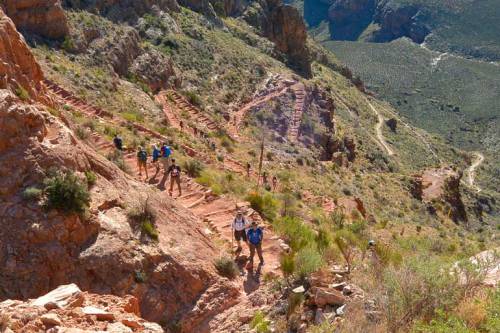
Some of the trillion steps on the South Kaibab Trail descent. (Snapped with the V2)
Pics like this one will look great in the Grand Canyon photobook I intend to make . . . one of these days!
 Subscribe to RSS Feed
